Calculator View
The calculator layout can be customised from the View tab of the Options dialogue box. When experimenting with layout, you can use the Apply button in the dialogue to see the effects of changes without leaving the dialogue box.On a PC the overall size and shape of the calculator can be changed by dragging the sides or corners to re-size the window. The keypads and display automatically adjust themselves to fit the available space. You can use this to make the calculator very small indeed, for example leaving only the display visible, and using the keyboard shortcuts to control it.
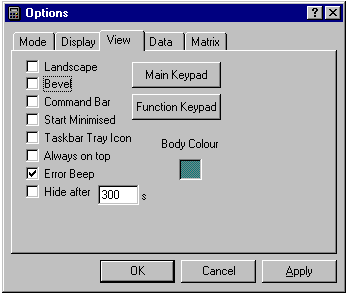
The Layout tab allows you to specify the orientation of the two supported keypads, Main and Function. Normally the Function keypad has a larger number of smaller buttons than the Main keypad, which has the main arithmetic keys.
In addition you can specify the colour of the body of the calculator, whether there is a bevel around the edge of the calculator window, and whether or not a menu bar (or command bar) is required. The bevel is not necessary from Windows95 onwards because the default windows already have a bevelled appearance, but it improves the appearance on older versions of Windows. The menu bar provides an alternative way of accessing some of the functions of the calculator such as loading and saving data and closing the application. All of the commands on the menu bar can be obtained in other ways.
Depending on your computer, you may see an additional "Choose HTML Browser" button. This allows you to select the browser to use if the HTML Help engine cannot be found. This is Microsoft Internet Explorer by default. Use this button to locate Internet Explorer if it is not found automatically, or to select another browser, e.g. Netscape. The Windows built in HTML Help is always used in preference to a browser, so if you are using Windows98 or a later version of Windows an HTML browser would not normally be needed.
Keypad Buttons
There are buttons for the Main and Function keypads. The dialog boxes are similar, and allow you to control the appearance of each keypad.It is possible to set the size of the keypad (i.e. number of rows and columns of buttons) to show more buttons than are actually defined, and this is in order to support future development of the software. Similarly, you can reduce the size of the keypad or disable the function keypad altogether for compactness.
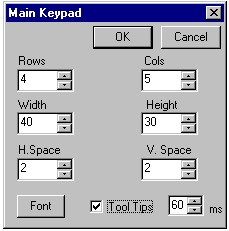
The button size and spacing between buttons are controlled by the two groups of edit boxes on the right. The font button produces a dialogue for selecting the font type and size. Note that some fonts (e.g. WingDings) are not suitable as they do not contain alphanumeric characters.
The appearance of tool tips (floating prompts) when the cursor lingers
over a button can be adjusted using the controls in the bottom left-hand
corner. They can be disabled completely, or the delay before showing them
can be changed as required. Tool tips are controlled separately for the
two keypads.
Landscape
Check this box for main and function keypads side by side. Otherwise they are aligned vertically.Bevel
Checking this option causes a bevelled edge to be drawn around the calculator body. This is redundant on current Windows desktop systems because a bevel is drawn by the user interface of the operating system.Command Bar
This check box enables or disables the command bar which gives access to menu items. It is possible to use the software without a command bar, and many users prefer not to have it.Start Minimised
If you check this box the next time the program starts it will be minimised to an icon. This option is particularly useful if you choose to have the calculator start up automatically with Windows (by putting a shortcut in the /Windows/StartMenu/Programs/StartUp directory).Task bar Tray Icon
This option causes the calculator to minimise as an icon in the Task bar Tray. You can combine this with Start Minimised as described above so that the calculator is always running and readily accessible while you are working at the computer.Hide after..
The auto power off feature means that after a specified number of seconds of inactivity the calculator minimizes itself.Always On Top
The always on top option keeps the calculator as the top-most window at all times. It can still be minimized. This is useful if you are using it in conjunction with an application that needs to use the whole screen area, so that the calculator "floats" on top.Error Beep
The calculator gives a beep sound if an error occurs. This can be disabled by this check box.Example:
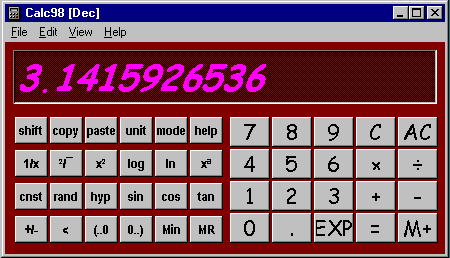
Using the options described above, the appearance of the calculator can be greatly changed from the default to suit personal preference and screen resolution. See the Display Tab for more information about changing the appearance of the display.An example customisation is given below: